You know how it is. The day starts off easy and then stuff happens. This time it was yarny stuff :) I have this yarn:
It is Knit Picks Chroma fingering in colour Holyhock (you can get it here http://www.knitpicks.com/yarns/Chroma_Fingering_Yarn__D5420203.html )
I decided to use it for a Test Knit (I'll write a post on Test Knitting soon) of a shawl for Agnes Kutas. You can see some of her designs here http://agnes.kutas.ch/category/catalog/patterns and of course on Ravelry. Anyway, the new shawl has been designed for a gradient yarn and should also work with the Chroma fingering, which has long colour changes that blend into each other. In my wisdom, I decided that I wanted to start my shawl with one of the pink colours in the yarn and unraveled some of the yarn to reach the pink. I found that one of my balls had a couple of joins in it and they didn't blend like the dyed colour changes do. So out came the scissors and I ended up with this mess:
I found after starting my shawl that working from 3 mini balls at the same time to blend the shades of pink was no fun at all. Out came the scissors again and with the help of the felted join, some persistence and three days!, I have made a gradient yarn out of my mess.
Some of my felted joins are a bit thick, but they all seem to hold. We will find out when the shawl is blocked just how strong the joins really are. I will report back once the shawl is complete.
Felted Join
To make a felted join, first check your yarn. These joins only work on animal fibers such as wool and alpaca. They will work on some blends and won't work on super-wash wool. Basically, if the wool will felt (e.g. if you were to machine wash the item), then you can join two balls with the felted join. All you need are your two balls of yarn, a strong pin and a source of water.
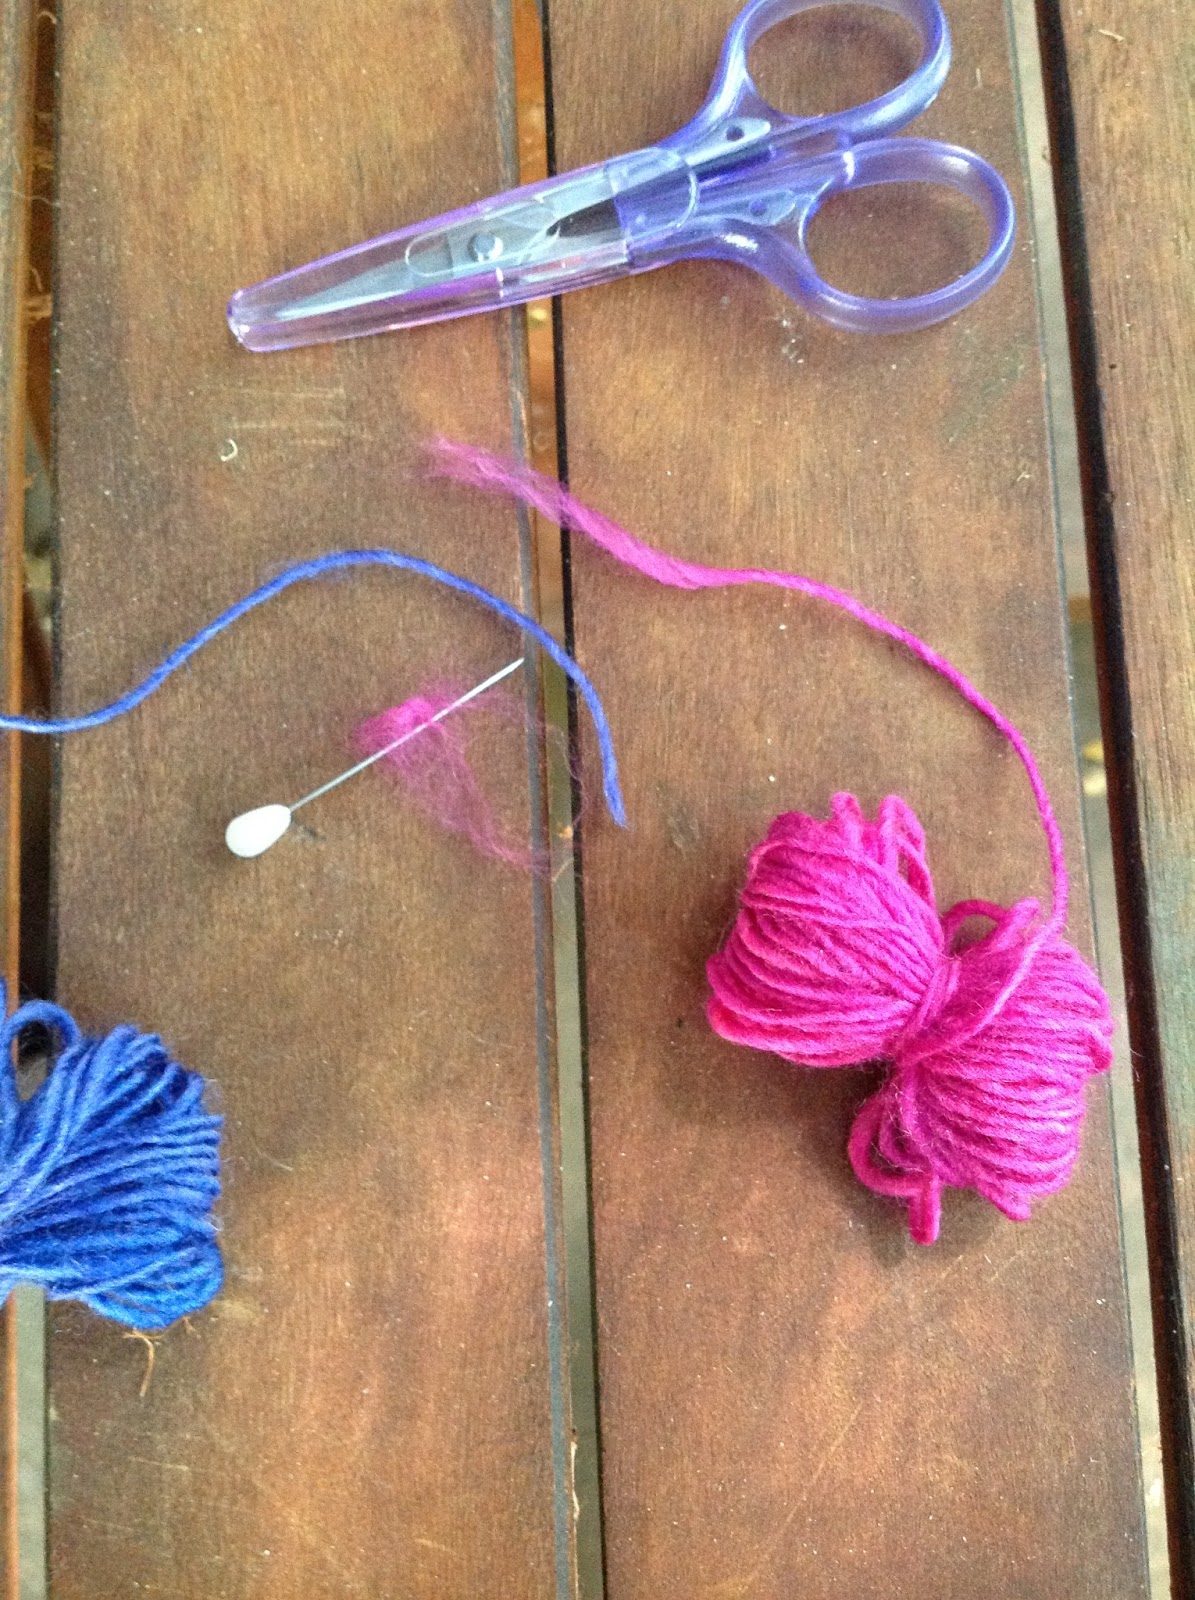
To begin, use the pin to tease out the ends of the yarn. You are trying to free up the ends of the yarn so that they will felt/mat in the joining process. At the same time, you are removing some of the fibers so that the join doesn't become bulky.
In the photo above, you can see that the pink yarn has a fluffy teased look to the end near the scissors. The extra fibers that have been removed are still on the pin. Tease out the ends of both yarns.
Overlap the two ends as shown. This yarn is a single ply and they can be a bit weak, so I overlap them so that the teased end overlaps the twisted full thickness of the other ball. Now we need the water to begin the felting process. You don't need much water, just enough to make your hand damp. In fact the easiest source to use is spit. Yes it sounds a bit icky, but it works. Lightly lick the tips of the fingers of your non-dominant hand. Lay the overlapped yarns over this area. Begin the felting process by rubbing your finger tips together (like you were trying to warm them), starting slowly to allow the moisture to penetrate the fibers.
At the top of this photo, you can see that the blue fibers have started to unite with the pink fibers. The end of the pink yarn is still fluffy and free. So dampen your fingers again and keep rolling the yarn between your fingers. Different types of wool felt at different rates. Merino and alpaca fibers felt very easily and quickly. Once the yarn looks like it has merged, gently add tension to it. If the yarns start to move apart, you will need to add a bit more moisture and roll the yarns again.
The completed join will look a little different to the milled yarn and may be a little thicker, but in general is not visible in your finished project.
Today I added my first two patterns to my Craftsy Store. As is fitting for the season, they are Christmas themed. I have a table runner which you can find here http://www.craftsy.com/pattern/quilting/home-decor/christmas-greetings-table-runner/180237
I used three feature prints with nostalgic Christmas images on them for the setting triangles and the main segments of the blocks. These were set off by the deep green snowflake fabric and a cream fabric with a gold star design. To compliment all of this lovely gold on the fabrics, I quilted the runner using gold metallic thread and some of the decorative embroidery stitches on my machine. A fun project that i really enjoyed making.
The second design is a matching table centre, which you can find here http://www.craftsy.com/pattern/quilting/home-decor/christmas-greetings-table-centre/180233?rceId=1449813826108~cwzxdrkr
This cute little centre is only 12 1/2 inches square and is perfect to add some Christmas cheer to a small table in your room. This project has also been embellished with metallic gold thread and decorative embroidery stitches, a much quicker version of the runner above. Do you like them? I hope they do well.