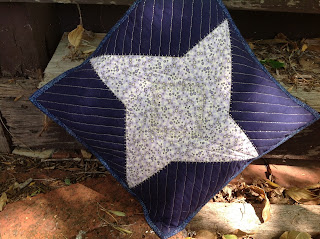
Quilting a small project is a great opportunity to try a new technique. I find cushion covers and bag fronts to be a perfect size to try a technique to see if I like it. They are large enough to really get a taste for the technique, but not so large that a tricky technique becomes intimidating. Also at the end of it, you have a finished (or nearly finished) project, not just a box full of samples.
The technique I want to share here is quilting with metallic threads. There are many different metallic threads available, many of which have been developed for the automatic embroidery machines. Metallic threads add a subtle or not so subtle shine to your project, depending on the thread and how much quilting you do. They can be combined with beading for even more bling (but that is a topic for another day).
I recently quilted the cushion cover shown above (pattern available here) with metallic thread in order to add some pizzazz to a simple pieced block. This is how I did it:
Firstly, I always mark my quilting designs on my quilt top. I use one of the temporary markers (such as this one for dark fabrics) to mark all of my quilting lines on the quilt top. For me this makes the quilting way less stressful. No I don't necessarily stay exactly on the lines, although I do try to stay as close as possible. When I'm done, the lines from this pen are removed with heat or washing.
For this project, I used a quilter's ruler to mark lines about half an inch apart across the backing, so that the lines radiate out from the star. I then used a different water soluble pen to add quilting lines within the star. I added a diamond to the center of the star and then connected the points of the diamond to the points of the star.
Once all of the quilting lines are marked, it is time to add the batting and get ready for quilting. I always add a layer of homespun or quilter's muslin beneath the batting. This prevents the batting getting caught in the feed teeth of my sewing machine and provides a nice lining inside the cushion.
For a small project like this cushion cover, I just pin the layers together with regular sewing pins. The sewing pins are easier to insert and remove than safety pins are and in a small project, there is not as much chance of the pin scratching you or falling out.
Next it is time to set up your sewing machine to use the metallic thread. The thread that I used, is cross-wound on the spool. If you look closely at the photo below, you can see that the thread makes "X" patterns up and down the spool.
These threads sew better if they are on the vertical spool pin. This allows the machine to pull them directly off the spool and limits the amount of curling and kinking that the thread can do before it enters the thread path of the sewing machine.
Other options for positioning the thread are to use the horizontal spool pin (hidden in the recess in the top of the sewing machine shown above) or to use a thread/cone stand behind the machine. When you are using a brand of metallic thread you have not used before, you may need to try a few methods to get the thread flowing smoothly into the machine. Remember, the finished results are worth the extra work of the set-up.
It is also advisable to use a Topstitch 80/12 needle with metallic threads. This is the needle to the left in the photo above. The topstitch needle has a long oval eye when compared to the regular needle shown to the right. The larger eye decreases the friction on the thread as each stitch is made and this helps to limit thread breaks.
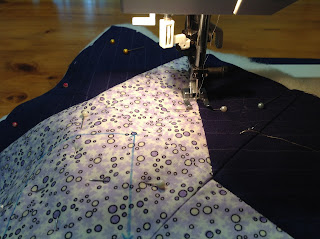
The quilting can be done either with the feed teeth engaged and the walking foot fitted or with the feed teeth disengaged and the free-motion/darning foot fitted.
As with a full size quilt, start fairly close to the centre of the project and quilt out to the edges. For the Twinkle Twinkle Cushion, I started by quilting in the ditch of the star, removing pins as I came up to them. When stitching with a metallic thread, sew at a slow to medium speed. Metallic threads are more delicate than regular sewing or quilting threads and break more easily, especially if you sew fast with them.
Once I had stitched in the ditch of the star, I then quilted all of the parallel lines on the background fabric. I quilted around the diamond shape in the center of the star with an open decorative stitch like these ones
and then added the last few lines joining the diamond to the points of the star with a regular straight stitch. At the end of any line of stitching that wa not going to be caught when the cushion was assembled, I took the threads to the back of the work, knotted them and used a hand sewing needle to pass the ends through the batting in much the same way as you do when hand quilting.
Metallic threads add a great sparkly effect to your quilting, especially on dark fabrics and for Christmas projects. I hope this inspires you to give them a try.


